Continued:
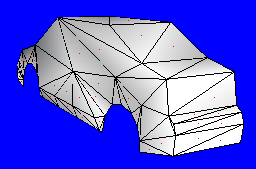
Now that your car's top, front, and back is done, your 3D view should show
a figure like this:

The bottom is harder than the top of the car, for you have to make the
wheel wells.This is relatively simple, but
is very time consuming.
You must use the bottom view for this, or your
polygons will face the wrong direction. Also, remember that the
wheel well isn't the whole width of the car. It's only the half of
the half of the car that you have now. This may get confusing if you
did the top first. There will be other polygons interfering with the
creation of the bottom.
Now let's get started:
 Switch
one of your windows to bottom view, if you haven't already done so. Click
on "Bottom" In the right click menu. -------------> Switch
one of your windows to bottom view, if you haven't already done so. Click
on "Bottom" In the right click menu. ------------->
The bottom view should look something like this:

So now you consult your 3D view once again, and find two vertices that are
on the bottom to create a face.
Here is the start of the bottom of my car. Once again, you can start
wherever you like.

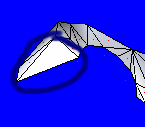
Making the wheel wells is the hardest part. You can model from the
bottom view, however.
Remember - If your faces are facing the wrong way, switch to the faces
level and click on the face you want to face the other way, using the
Reorient tool.
You should consult ALL VIEWS when making the wheel wells,
especially the side view so you can see which verticy you are clicking on!

You should position your 3D view so you can see the front wheel well
clearly, such as: --------------------------------->
Now we start the wheel well by finding these vertices in the bottom view:
Move the verticy circled in GREEN somewhere slightly closer to the
side of the car, past the middle of the half-car using the bottom view,
using the X axis.

The green verticy will now be in this position:
You will have to make another face to fill the position that the green
verticy was in in the previous spot.

It will then look like this: --------------->
NOW you can start on the wheel well.

You start with these three vertices: ----------------->
And you make a face with those three vertices.

And it should appear as this: --------->
You can now continue the wheel well with that one
face, around the whole wheel well.
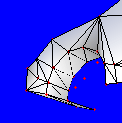
After you're done the first wheel well, it should look like this:
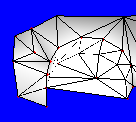 You
should now close up the wheel well. To do so, you have to use the You
should now close up the wheel well. To do so, you have to use the
 side
view. Click on the vertices and close it up to look something like
this: side
view. Click on the vertices and close it up to look something like
this:
YOU should be able to continue the rest of the car now, and after some
time passes by, you should be able to have the bottom complete, which
looks like this:
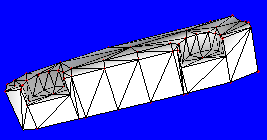
If you are successful with making the bottom, you are now ready to
texture! |


 Switch
one of your windows to bottom view, if you haven't already done so. Click
on "Bottom" In the right click menu. ------------->


 You
should now close up the wheel well. To do so, you have to use the
 side
view. Click on the vertices and close it up to look something like
this: